Updated with Dec 29, 2025
Diagnostic
1.Installation abnormal.
Please check whether the HDD installation follows the correct procedure. You may refer to the HDD installation video provided below for guidance.
IT12 HDD Installation Tutorial. This tutorial is also applicable to other models.
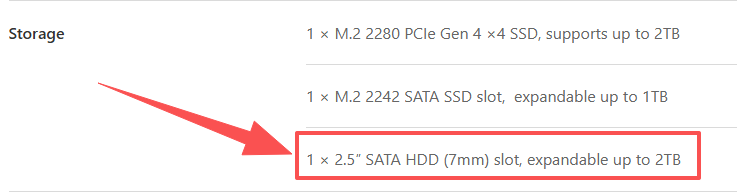
2.Check compliance:
Ensure the installed HDD meets GEEKOM product specifications — 1 × 2.5″ SATA HDD (7mm) slot, SATA 3.0.
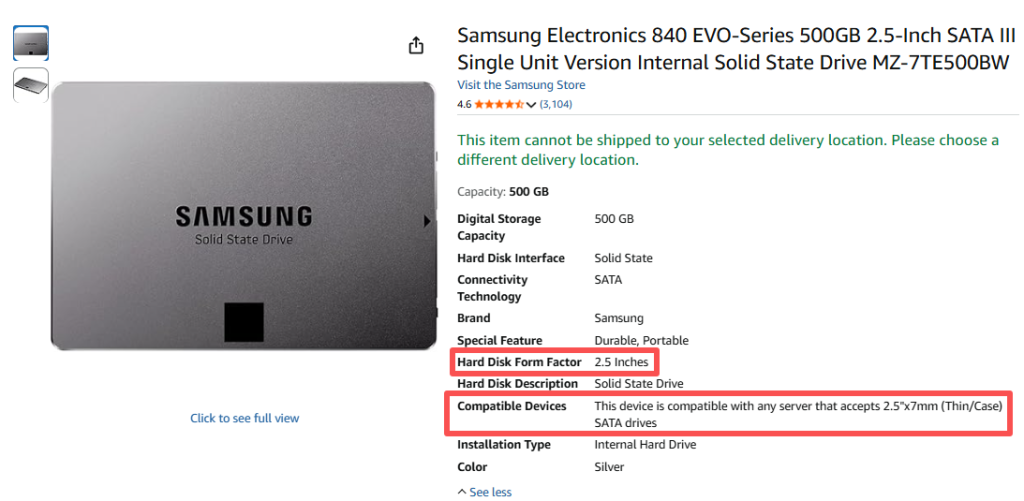
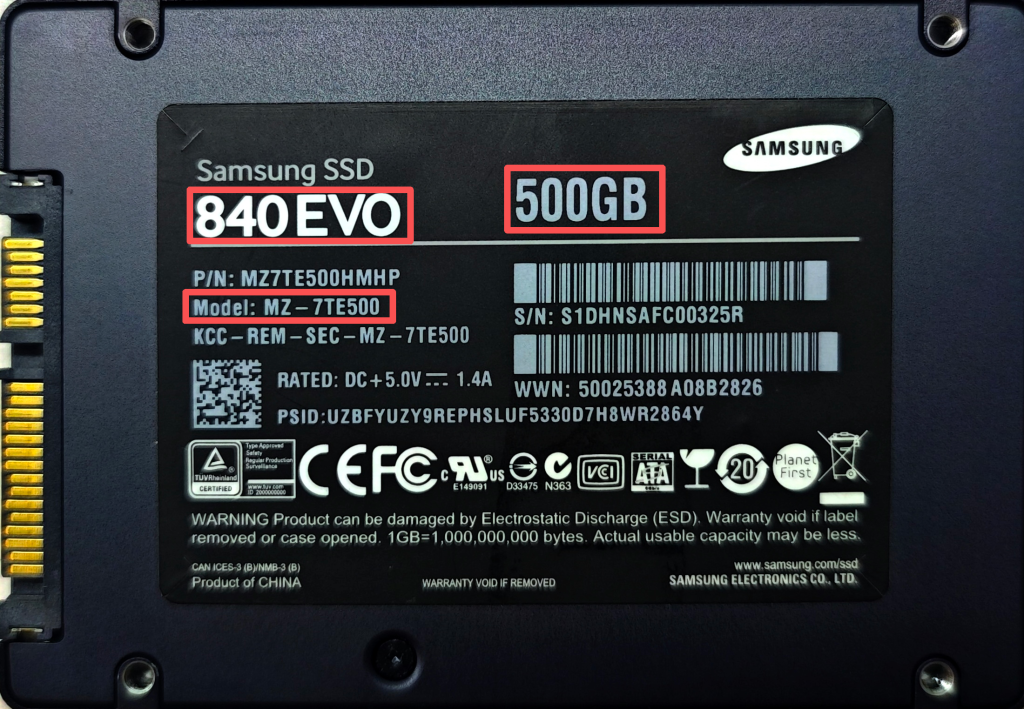
To view SATA hard drive specifications, you can search for the HDD model via a web browser, check the information on the HDD casing, or review the detailed product page where it was purchased.
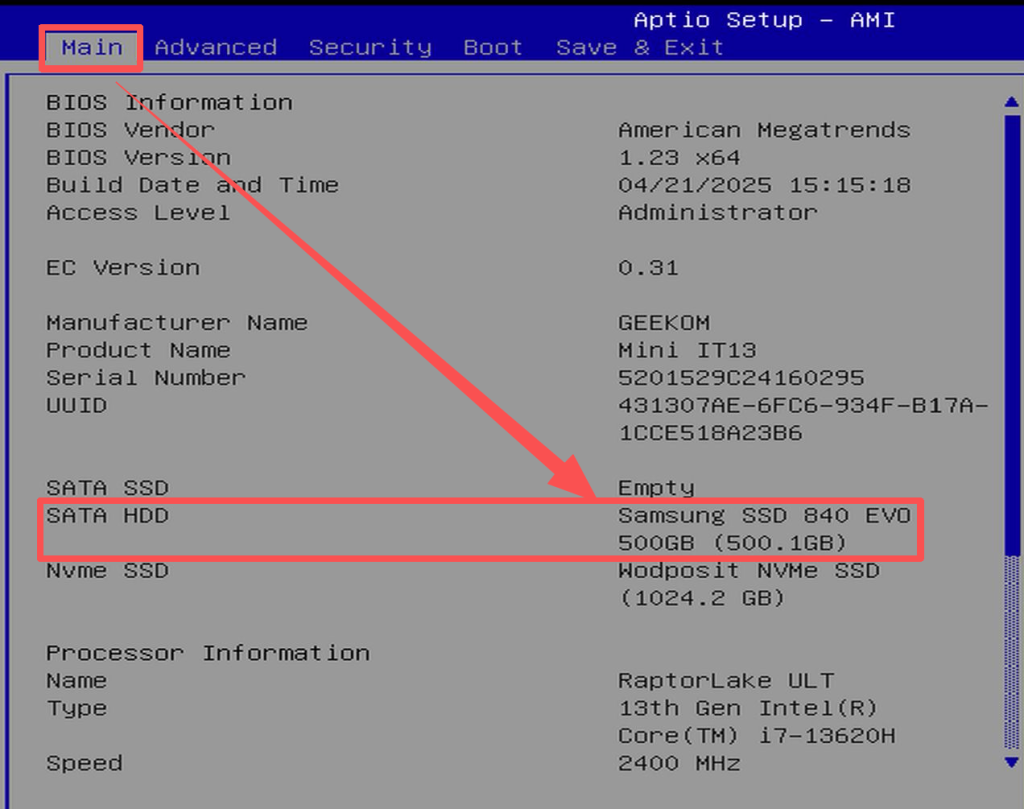
Taking the example of adding a Samsung SSD 840 EVO to the IT13 model.
| Figure sourced from IT13 Specifications |
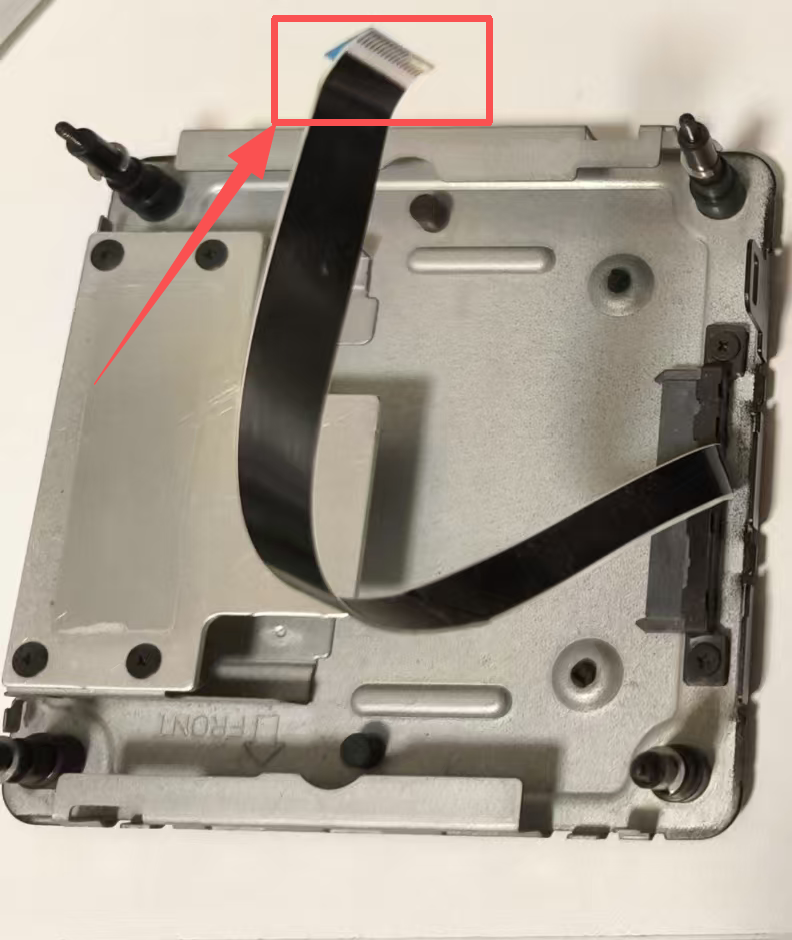
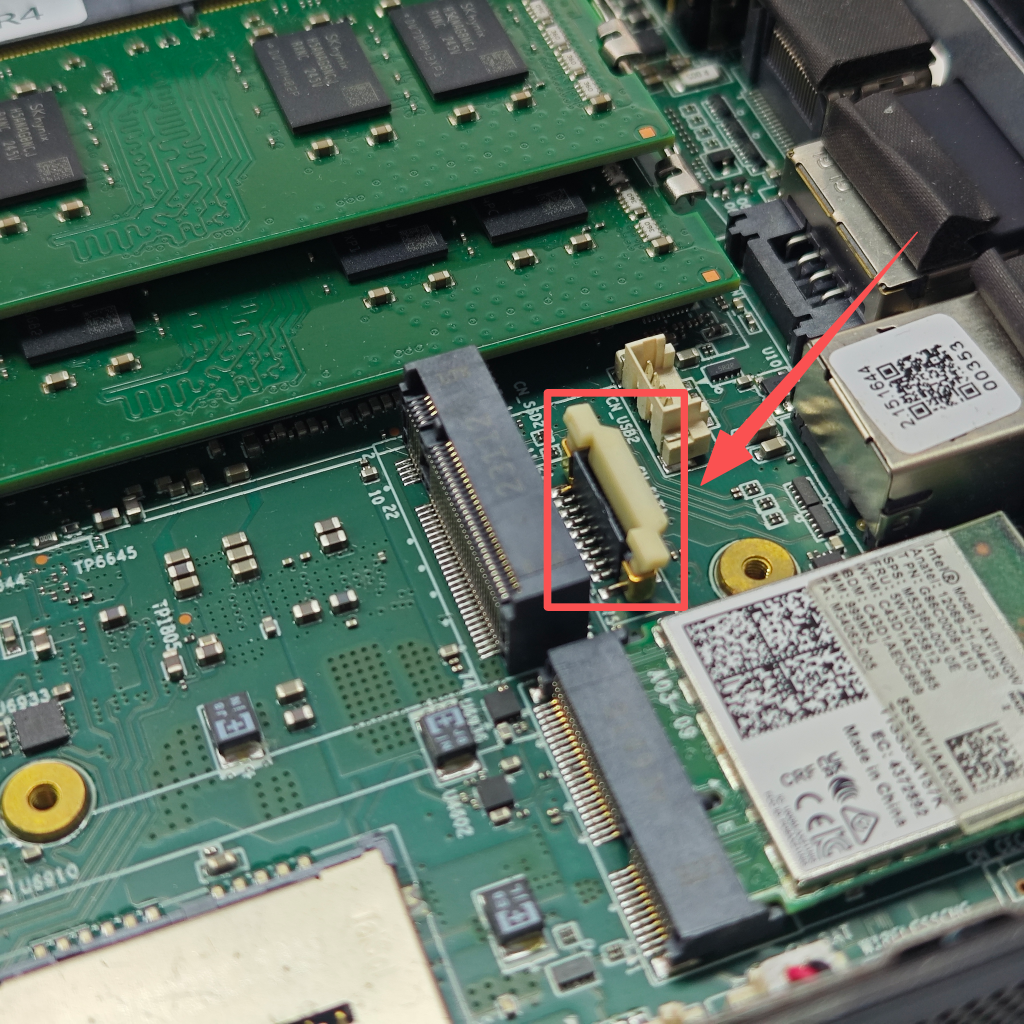
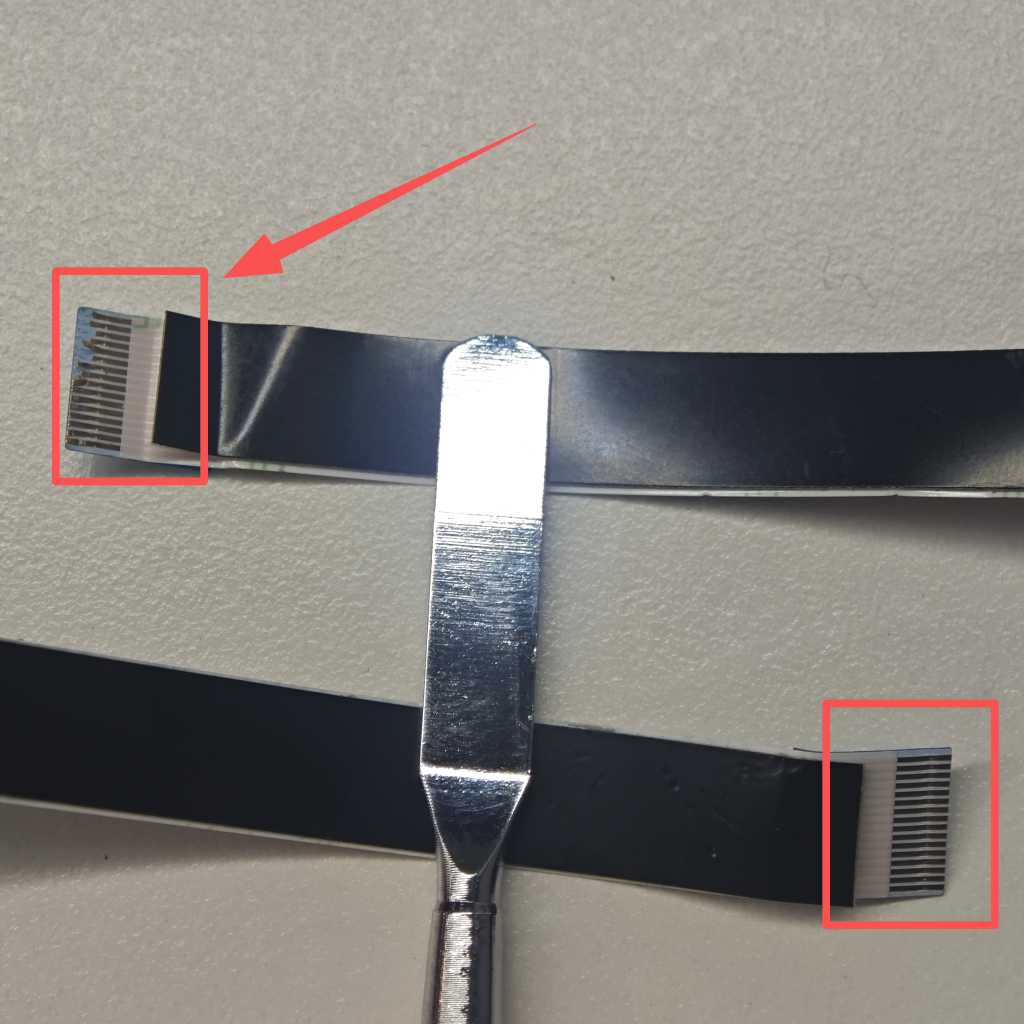
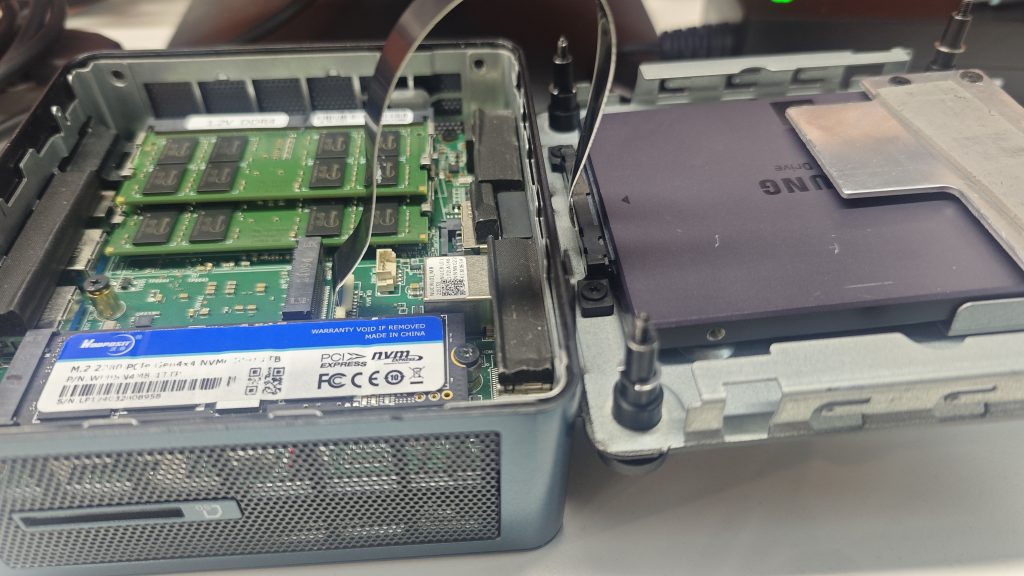
3.HDD ribbon cable damage.
Frequently plugging and unplugging this cable can easily cause damage to the cable connector. Damage or poor contact in the cable connector may prevent the device from recognizing the added hard drive and, in more severe cases, could cause the device to fail to power on.
Solution:
A.Poor contact at the end connector — reconnect the ribbon cable and correct the insertion orientation. Refer to the image below.
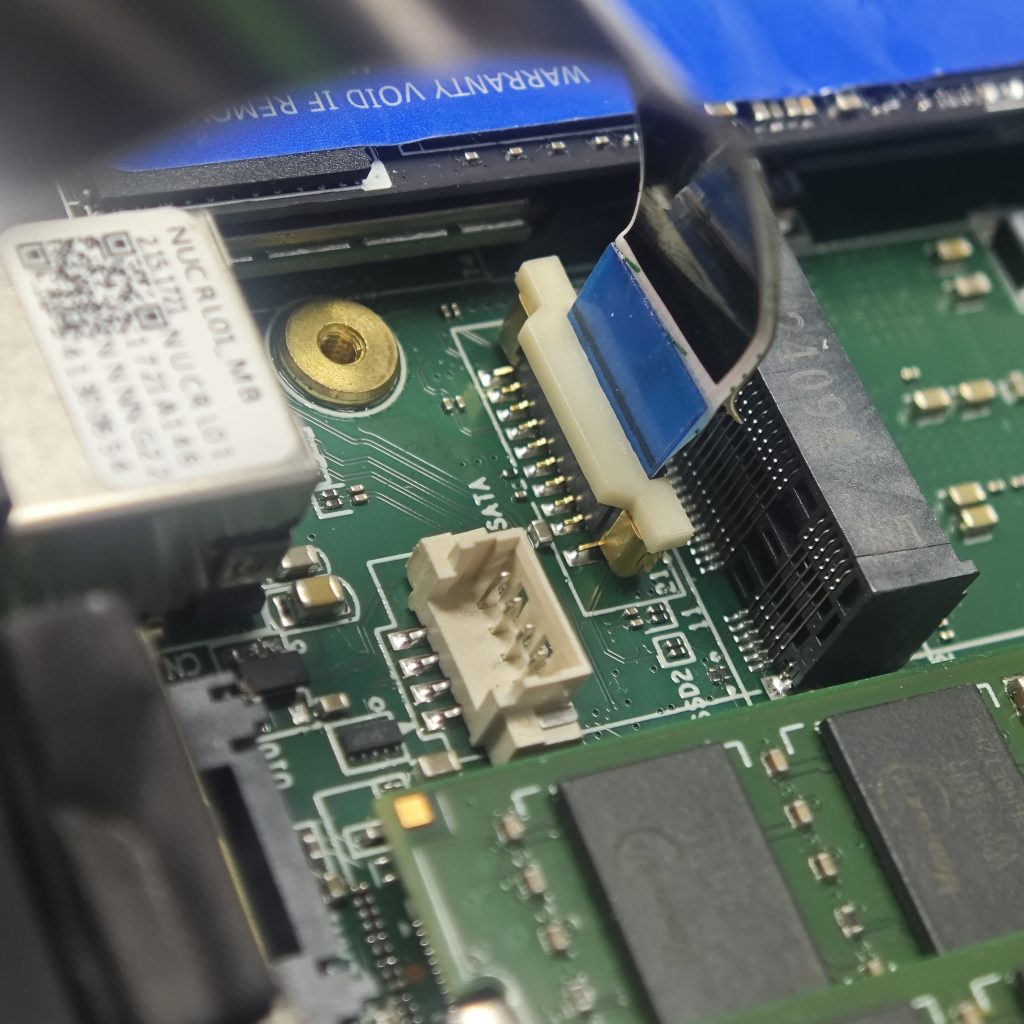
B.The end ribbon cable is damaged, as shown in the figure. You will need to purchase a new SATA ribbon cable to replace the damaged SATA module.
Purchase Link:https://www.amazon.com/Intel-Drive-Cable-Black-Compatible/dp/B0D5VNWVRY
4.Check if the HDD is recognized:
In the BIOS, navigate to the SSD options and verify whether the HDD name appears in the list of detected SSDs.
- The memory and hard drives installed internally in GEEKOM products can be viewed in the BIOS for their corresponding model and specification information. To access the BIOS, press the Del/Delete キー repeatedly during startup or reboot until the BIOS menu appears.
- Navigate to the Main tab in the BIOS and scroll down until you see the SSD information. Using the IT13 as an example, the comparison between having an HDD installed and not having one installed is shown in the figure below.
Tip:In some GEEKOM models, hard drive and memory information may be displayed under the アドバンス tab in the BIOS, or within the System Information option, which needs to be selected and entered to view the details.
| The IT13 has a SATA HDD installed. | No SATA HDD installed on IT13. |
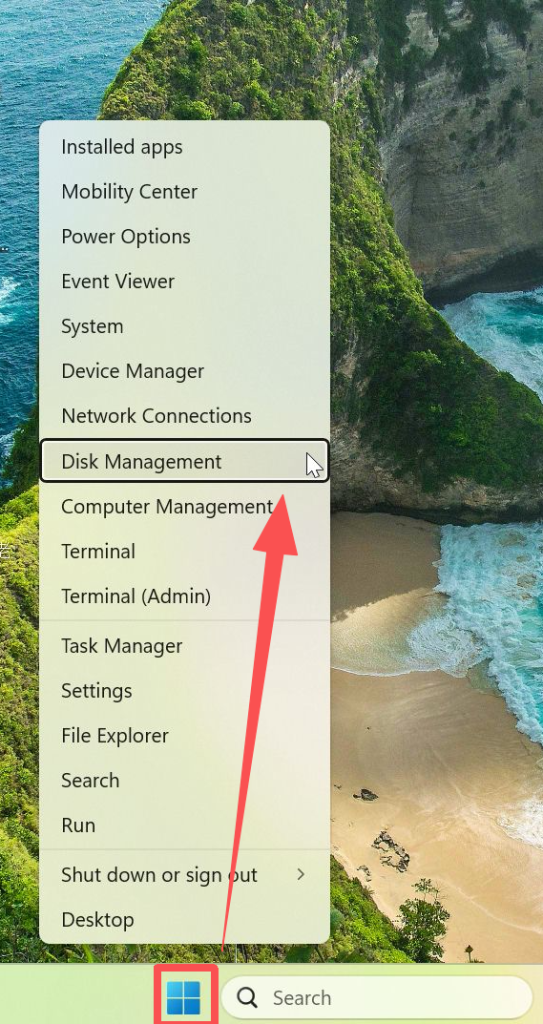
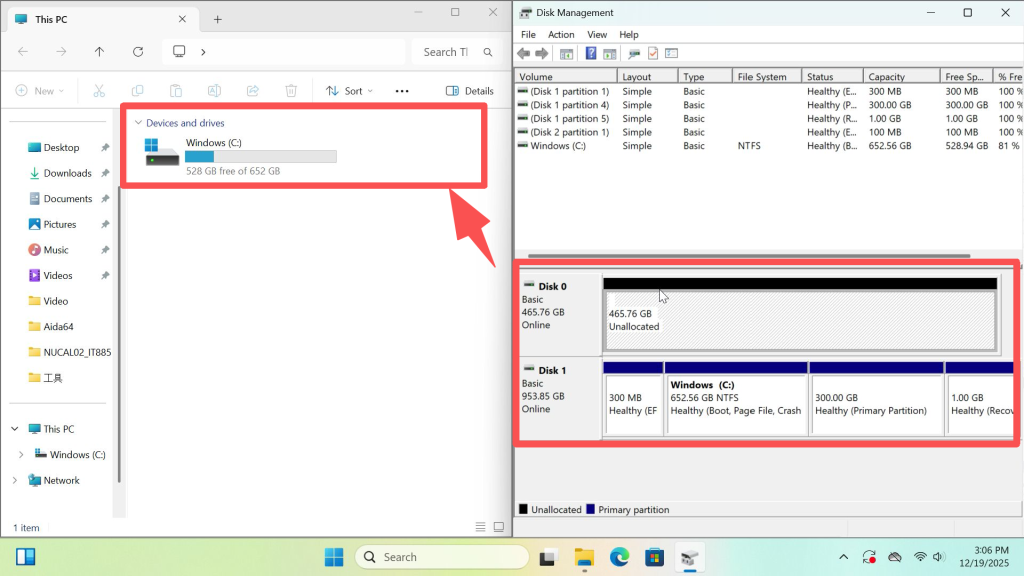
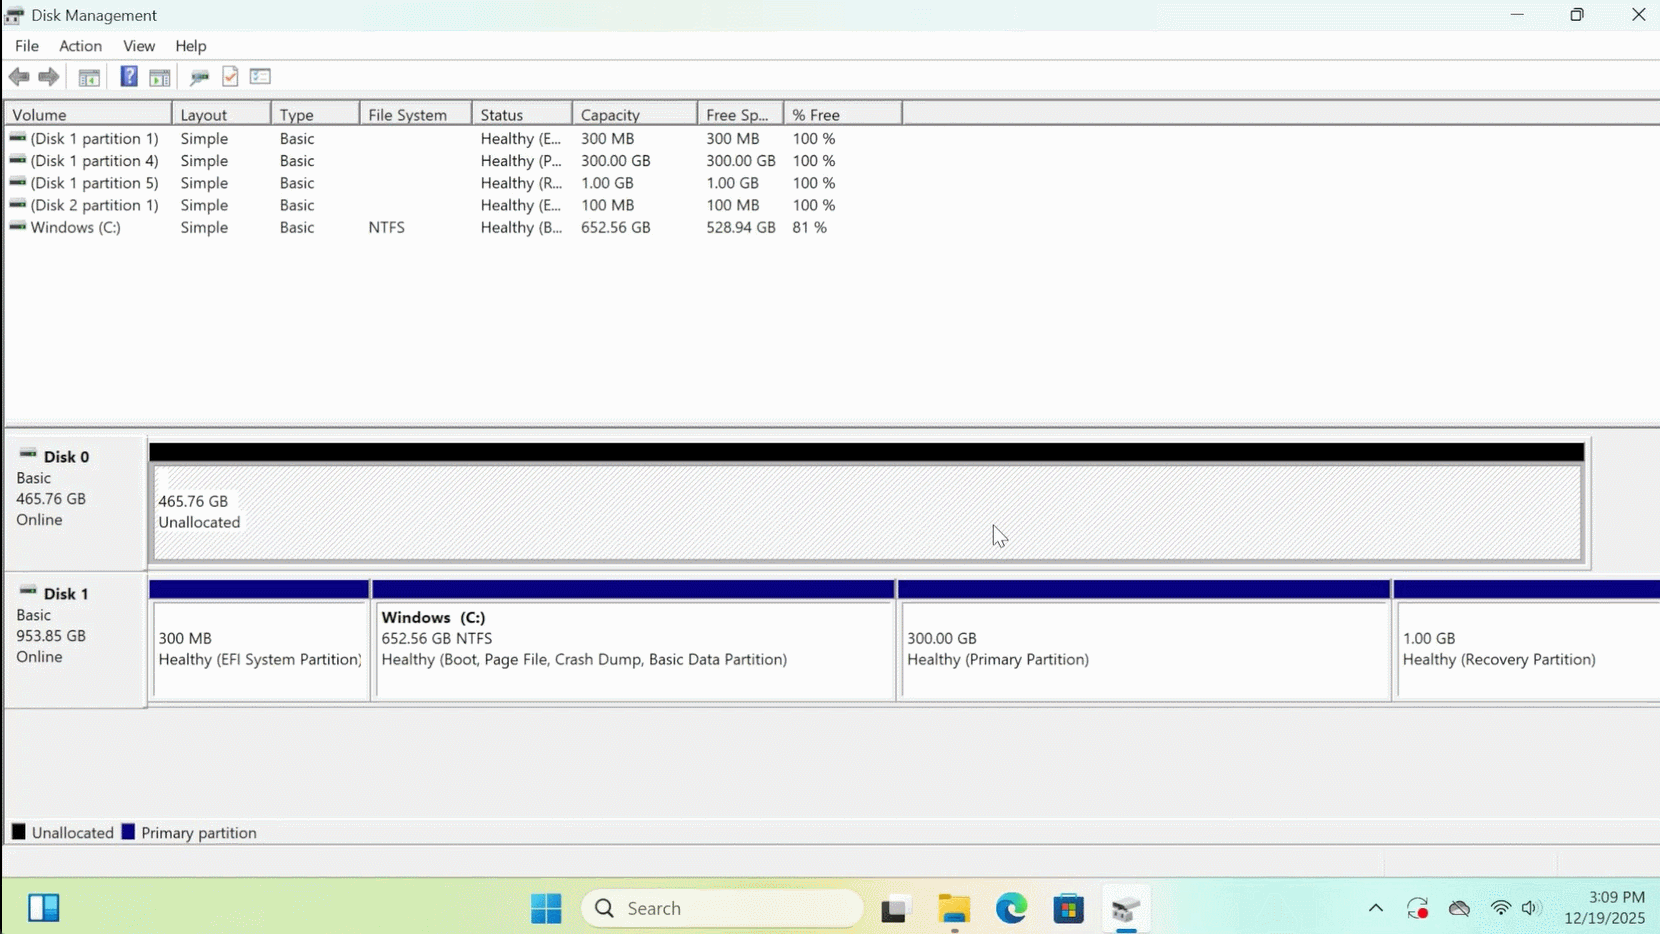
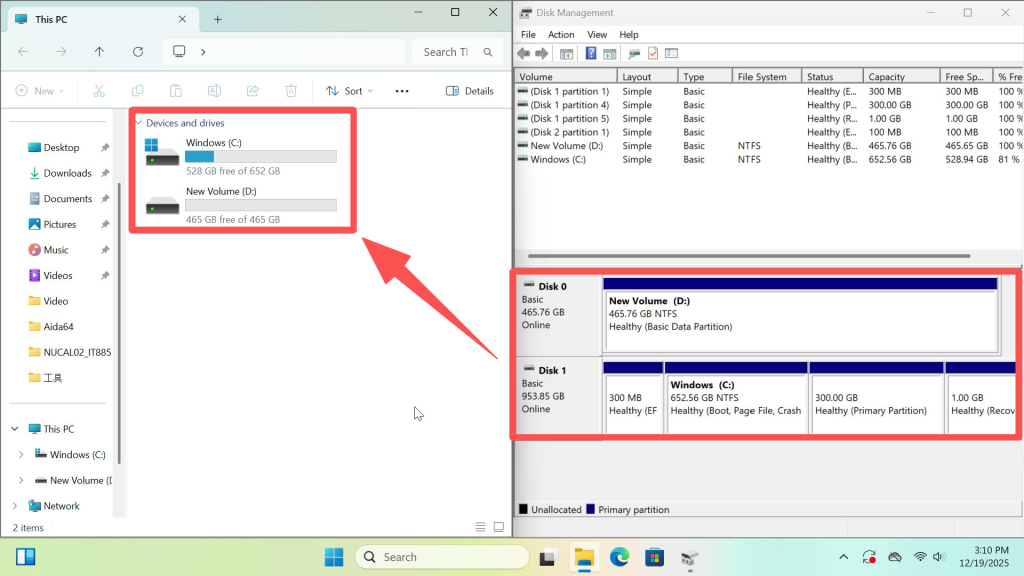
- The hard drive is detected in the BIOS, but no new disk partition is displayed in the operating system. This may be because the newly installed drive’s space has not been formatted or assigned a drive letter (such as C:\, D:\, E:\). Right-click the Windows icon on the taskbar, select Disk Management, locate the newly added hard drive, and proceed with formatting it. The specific steps are as follows:
| WIN11 Format New Hard Drive Partition Operation |
ご視聴ありがとうございます。間違いがありましたら、訂正をお願いします。