Обновлено с 6 ноября 2024 г.
1. Дважды щелкните, чтобы открыть EC_Debug_tool
EC Tool Download: Нажмите здесь
- It is recommended to 【Run as administrator】 to ensure that the program runs normally——Step1【Run as administrator】.

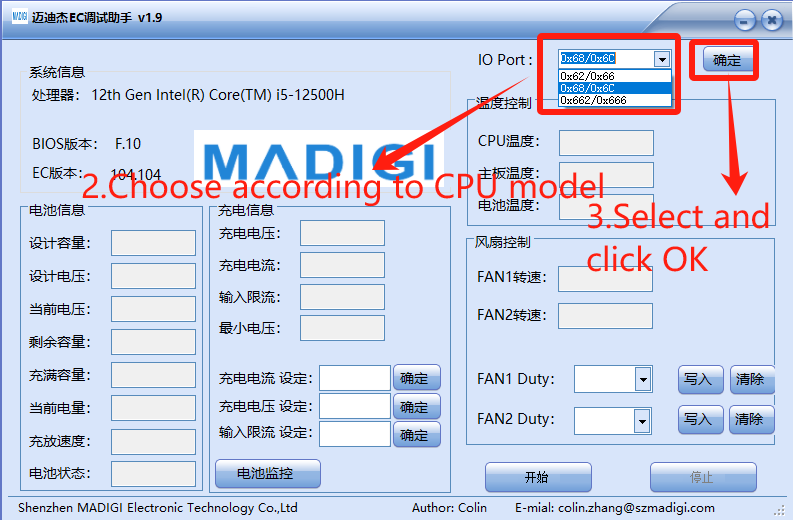
2. Установите в соответствии с маркой процессора
- Choose according to CPU model
- IO Port: Select 【0x62/0x66】for CPU Intel platform, click “OK”——Step3【确定】
- Порт ввода-вывода: Выберите 【0x662/0x666】 для процессора AMD platform, click “OK”——Step3【确定】
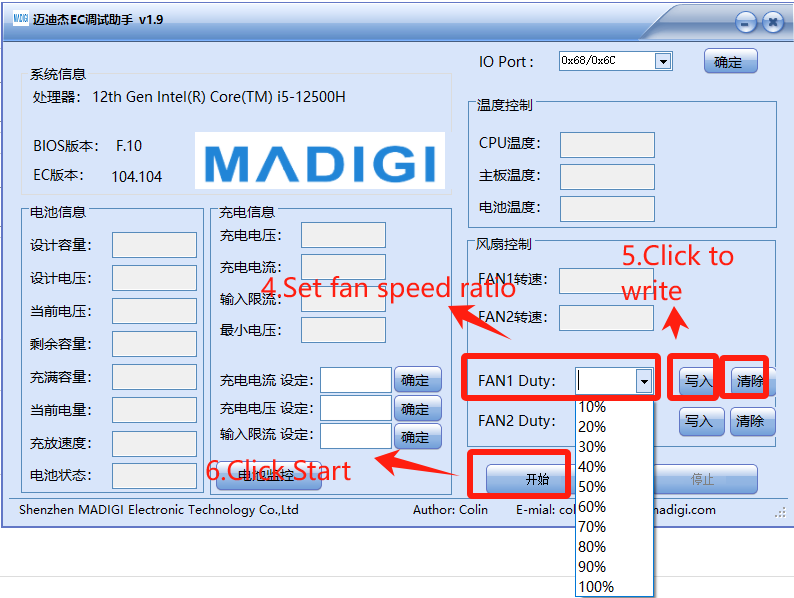
3. Установите скорость вращения вентилятора, просто настройте ее в 【FAN1 Duty】
- Set fan speed ratio——Step4【FAN1 Duty】
- Click to write——Step5【写入】
- Click Start——Step6【开始】
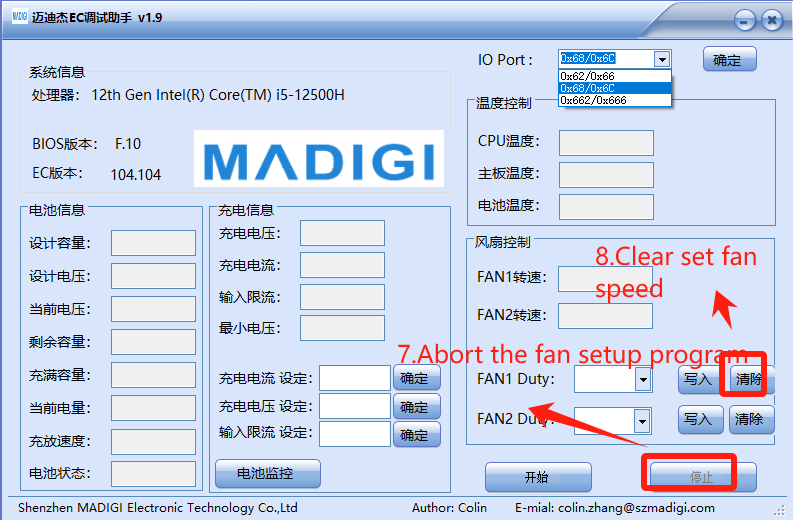
4. Очистите настройки и выполните повторную отладку
- Abort the fan setup program——Step7【停止】
- Clear set fan speed——Step8【清除】
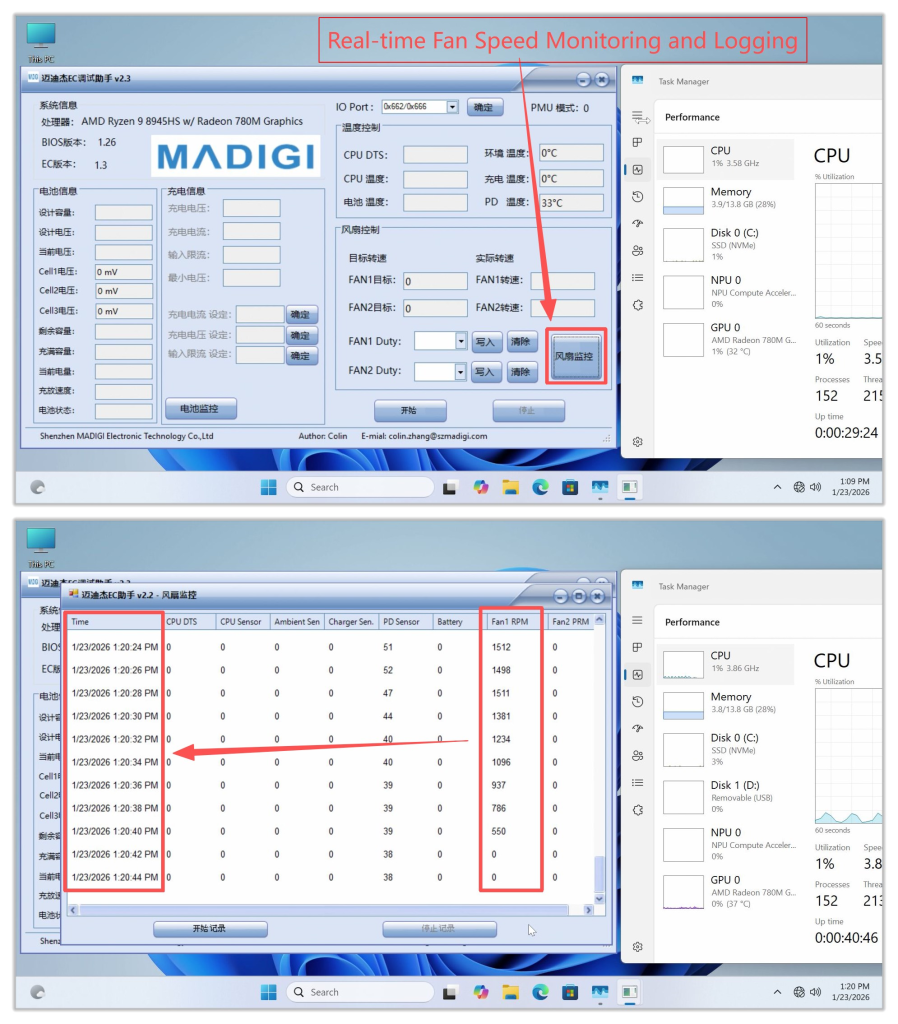
Other Features: Fan Speed Monitoring and Logging
- Clicking this button will display real‑time fan speed. If the fan speed is abnormal, you can take a screenshot and provide feedback to GEEKOM Engineers.
- It is recommended to open an additional Task Manager window and place it nearby to monitor hardware resource usage under different fan speeds. Generally, higher CPU usage leads to increased temperatures, which in turn causes the cooling fan speed to rise.
Спасибо за просмотр. Если есть какие-либо ошибки, ваши исправления приветствуются.